|
- FOCUS ON TRAILERS - The Willys MBT Restoration.
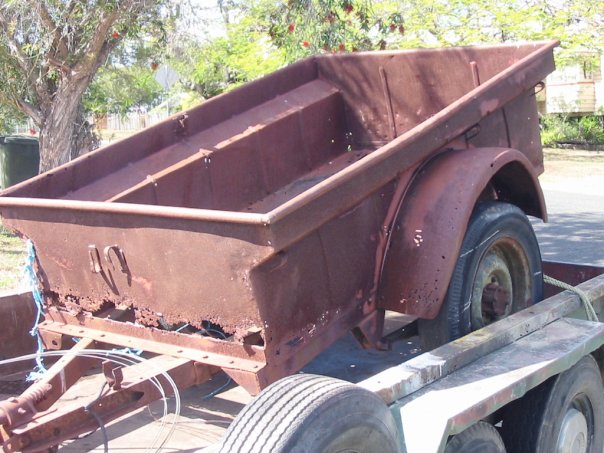
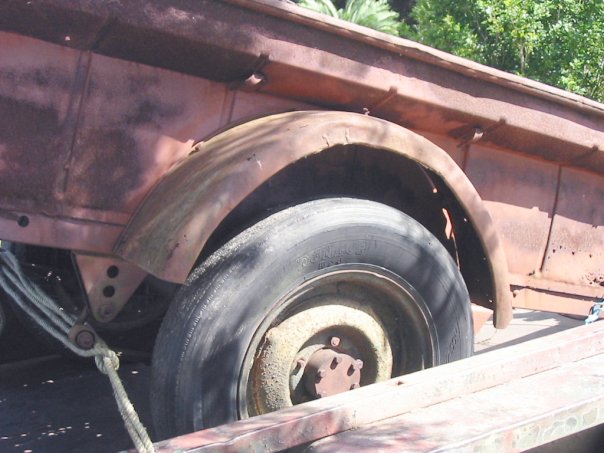
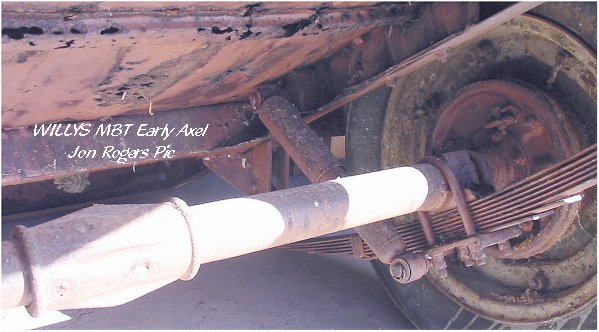
Purchased for AU$500.oo (US$270.00) sight unseen, and thanks to Harry Cislowski sending me an email, I was fortunate to buy this Willys MBT at such a low price. It doesn't look much at first glance, but I believe it's a diamond in the rough, and will restore very nicely. The basics are there, the frame is in great shape, the original axle, lunette, and one hook and chain are present, but the tub is 80% shot, but mostly original, having had the front panel replaced at some stage. Both fenders are in need of lots of attention, but there's two combat rims in reasonable condition, the two "civvy" tyres are throw a ways. No handbrake or cable and no light switch. Harry, Thanks mate....a typical Queenslander, always there when needed, I can't thank you enough.
CLICK ON THE THUMBNAIL TO OPEN
The Trailer arrived in the back of Harry's tandem trailer. Bit of a thrill to see, and some shock at the amount of rust. I took an instant appreciation as too it's history and significance, and immediately fell in love with it. This was going to be a slow process if I wanted to do it justice, but anxious to start.
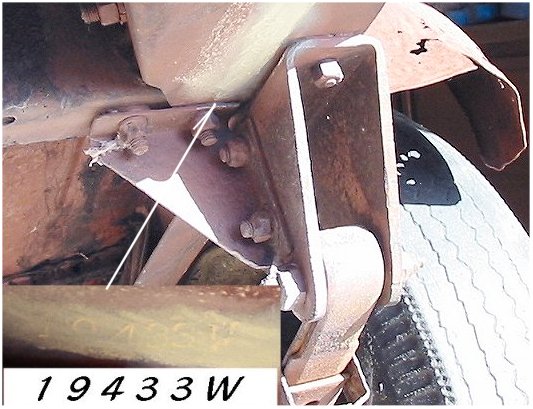
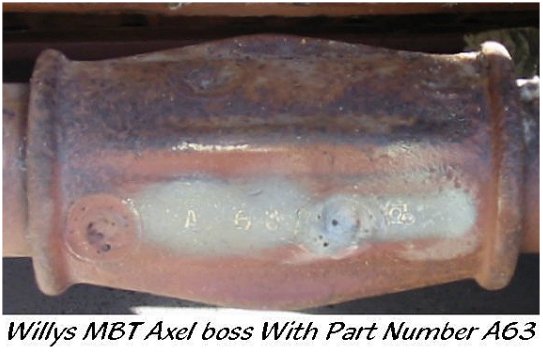
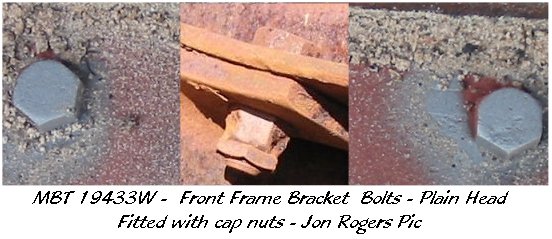
Within the first hour of Harry leaving, Patch and I had found the numbers, exactly where it was expected to be, the left side front frame spring gusset. 19433W . A very Early 1943 MBT. A few little surprises, some of the original pal nuts were still in place, original shock absorbers, Willys springs, and almost all bolt heads have the Willys "A" marking.
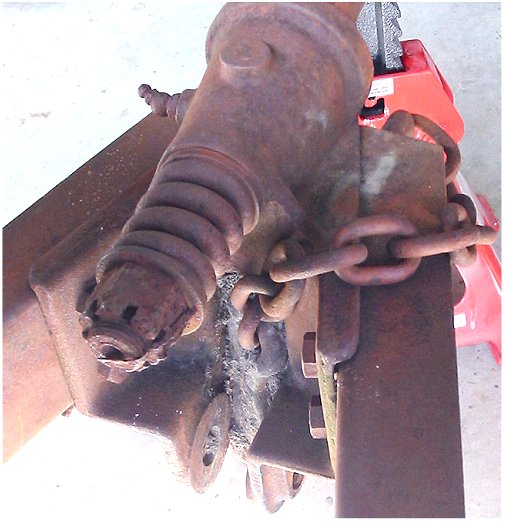
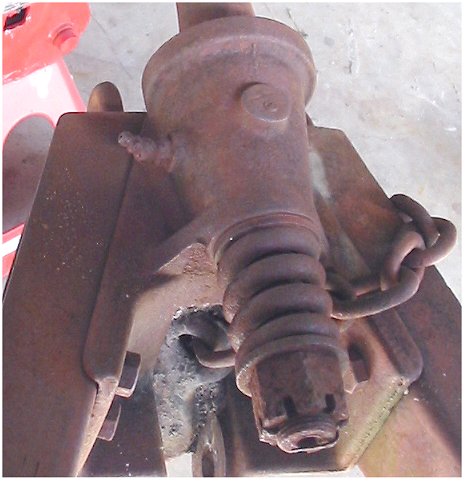
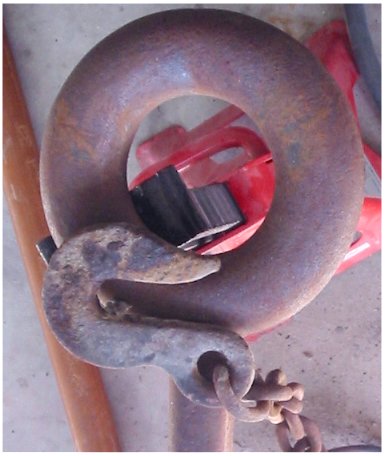
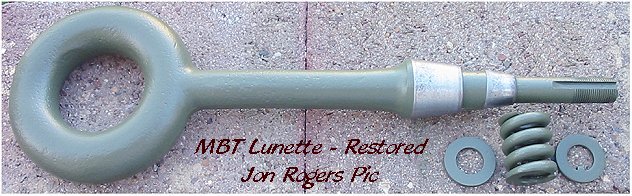
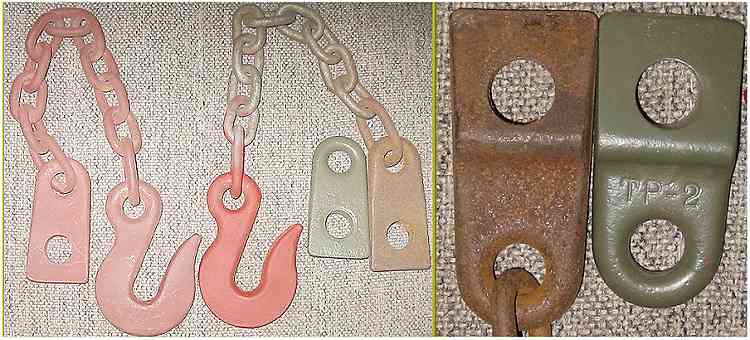
First job was to see if there really was a hook attached to the disappearing chain, and there was, a little worse for wear, but it's a start. Beautiful, original Lunette, shame about the nut. The lunette was frozen with rust, not having seen grease for untold years.
It was rather strange finding the hook tho'., as it was jammed up in between the space where the landing leg had been removed, and covered in years of built up hard packed mud.
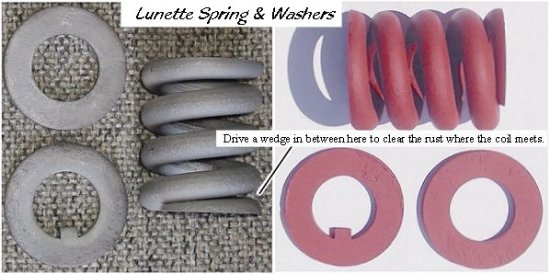
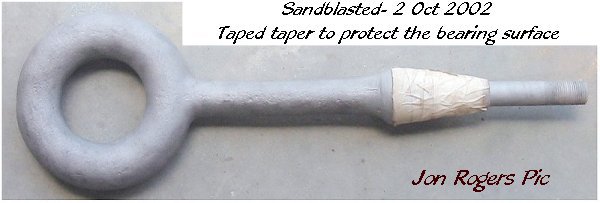
Being a bit worried about the condition of the Lunette, Patch and I took some time to get it out, as it was totally frozen into position, using a decent sized length of bar and a 2' long engineering wrench, we finally managed to get the lunette to turn, and the nut removed. Patch volunteered to do the blasting. After masking off the ground surface of the taper, Patch had a ball, we also blasted the spring and washers. Here's something to think about, if you wedge a screwdriver into the gap where the spring meets at each end, you can get every bit of rust removed. The taper was then linished and repainted. First job done.
7th October - Next was to
see if I could find a landing leg casting, almost impossible at the
moment, so I thought I'd have go at making one. On Friday after lunch, I
drew up the casting from a borrowed one, and rushed over to the steel
fabrication shop just before they closed, bought some scrap pieces for
AU$5. came home and started to cut it out. All Saturday was spent, cutting
and
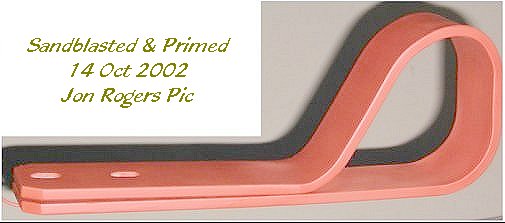
12th. October
The Landing leg is
progressing , having cut the steel to length, drilled the mounting holes,
elongated the rear ones as per the original, and made the first bend, and
that's where it has stopped due to a
In the meantime, I went ahead and made the locking pin
replacement, this turned out to be a 10 minute job, having picked up a
small off-cut of 5/8" round and some 3/8" rod. It still requires the pin
to be machined down
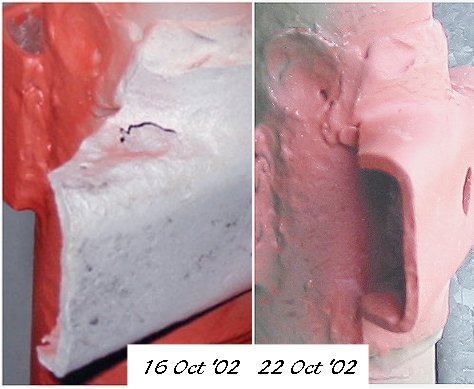
I thought I'd try my hand at making a hook, I have no idea
how this will turn out, but as "they" say, I won't know unless I
try.....here's the first step, the 5/8" plate roughed out there's some
serious grinding and filing to do within the next week.
18th
October -
Received a complete NOS Left Side brake assembly from Bruce
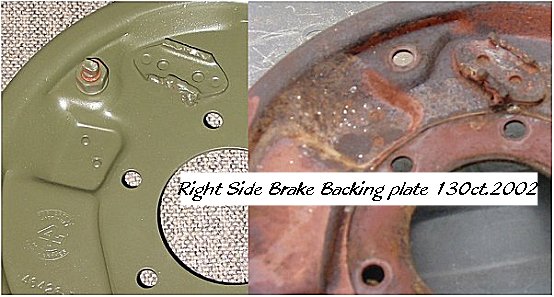
Managed to find a right side Brake backing plates to replace the damaged ones that came with the trailer, thanks again to Bruce Teterin. It's coming up from Sydney, and I should be able to pick it up at the annual Brisbane Swap this weekend. (Update: Unfortunately the bloke who thought he might have one... didn't!... so I'm still on the look out for a right side plate in reasonable condition. See Wanted List Above)
26th October - Great weekend
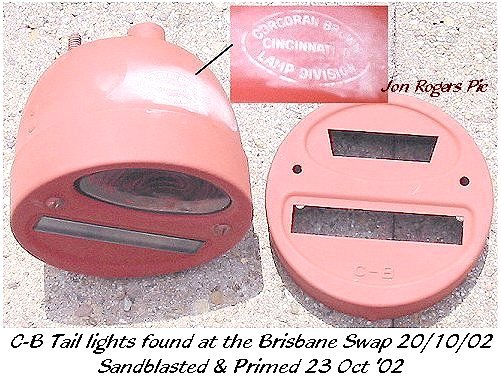
in Brisbane at the Annual swap meet on the 20th, found
My biggest disappointment was not being able to find the right side brake backing plate, but I have a few leads to follow up. Also found NOS axel U Bolts for the shockie/spring brackets, ( Thanks again Sean). In all, a very productive weekend at the Swap. 3rd November - A mixed week of progress and setbacks, due to the compressor playing funny games, I spent most of the time fixing and adjusting it so I could at least sand blast some of the bits and pieces.
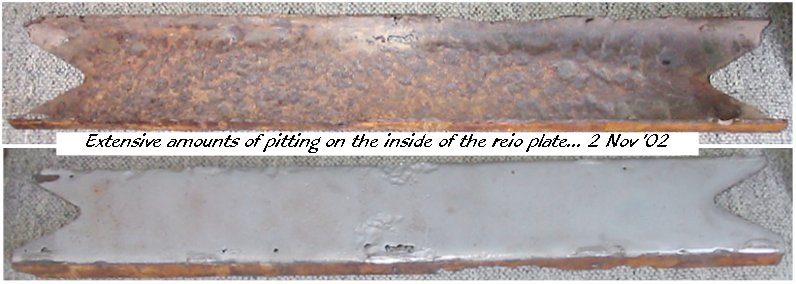
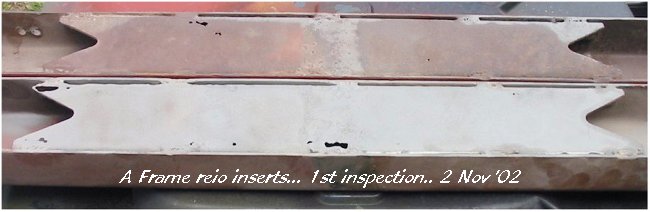
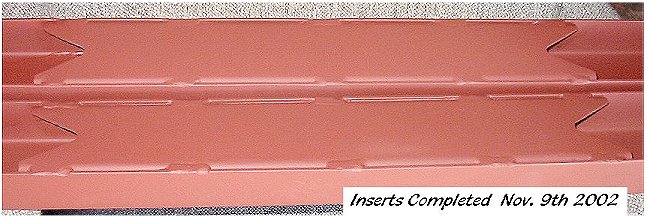
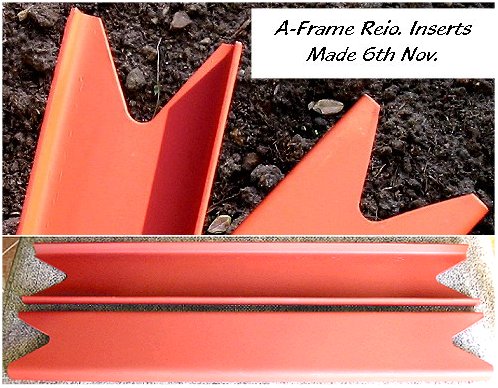
The A-Frame braces were removed, and I thought I may get away with some small rust hole repairs in the reinforcing inserts, however, upon closer inspection both sides were near collapse from internal rust where it's probably never seen paint. Using an air driven 3" cutting disk tool, the five welds on each side were cut through, and the insert levered out. So these will have to be replaced after I make some new ones. The good news is that the braces show very little pitting, and are sand blasting up nicely. I've drawn the reio inserts and the brace, so making and reinserting the reio. won't be a problem. I'll prime both pieces before re-assembly, and clean up only where I'll re-do the five welds on each side, this should give the braces the best chance of remaining rust free into the future.
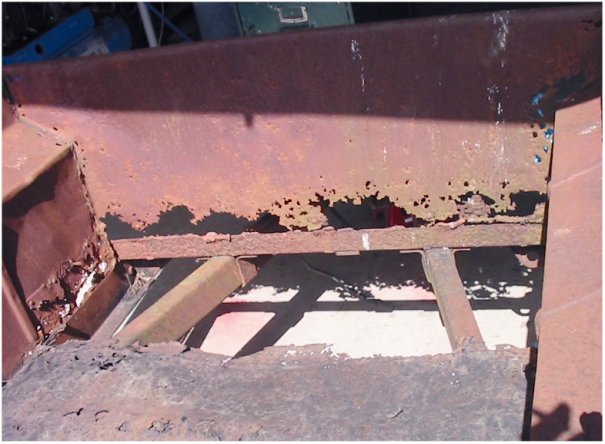
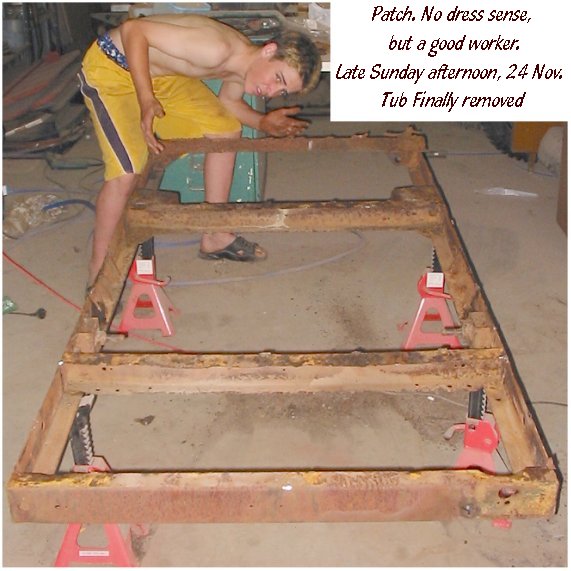
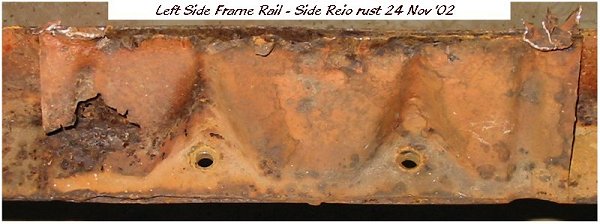
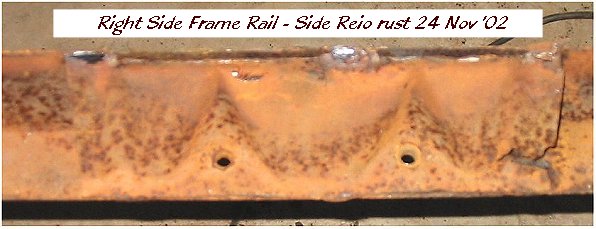
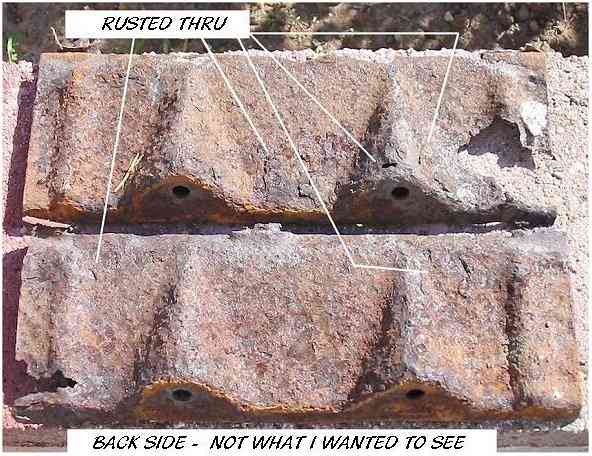
In the meantime, the tub was turned over and the frame
inspected, that's when you realize there
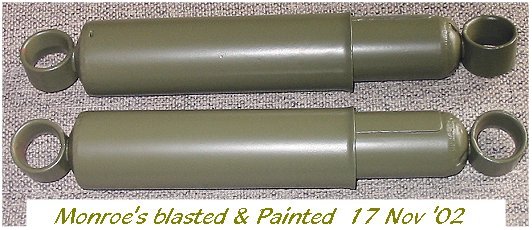
17th November I've spent the
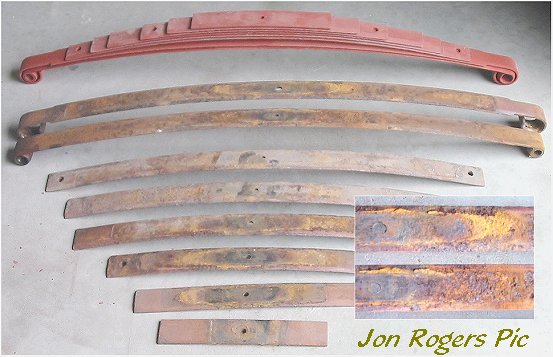
whole week blasting a spring set and the Monroe shock
I was surprised to find that the Monroe's are usable,
just requiring a light sand blast and painting, new rubbers are arriving
this week. They've been the easiest part so far to fix. The Willys spring
straps are
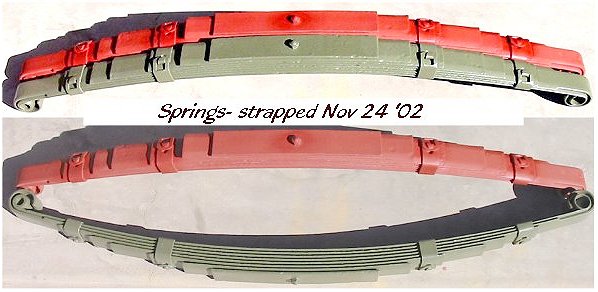
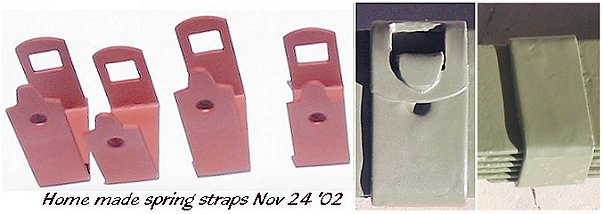
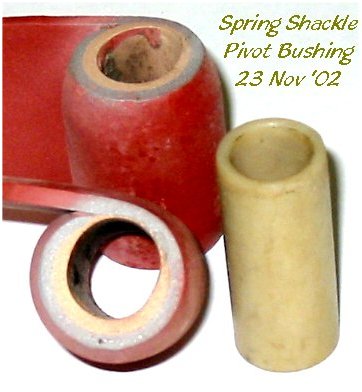
24th November Both springs sets are now blasted, pivot bushings replaced, reset, primed ( one painted) and strapped. I decided to make the spring straps after some consideration, as they were easy enough to make, and no problem to fit. I managed to find some new bushings for the pivot , being modern, they were not brass, they were exactly the right size.
The Restoration Begins
8th DecemberSpent
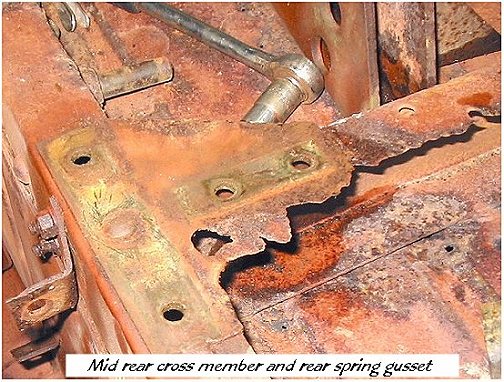
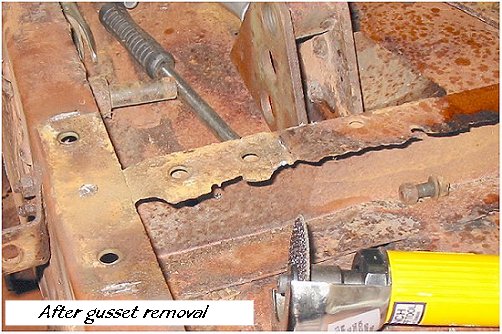
the last two weeks making cross members and gusset plates, sandblasting
parts and welding up the side reio plates. Fixed the compressor, so things
are running smoothly again.
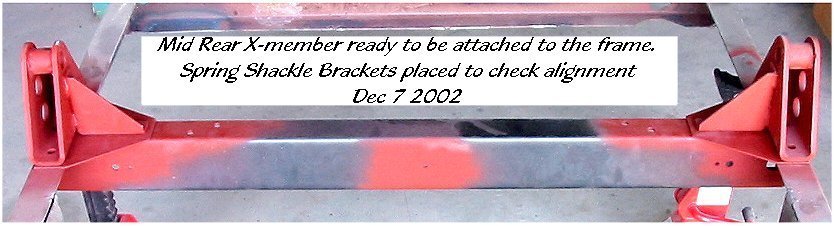
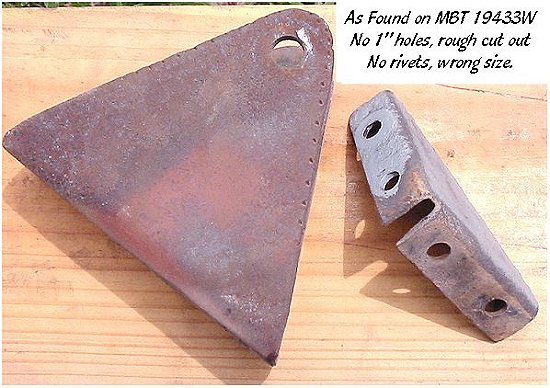
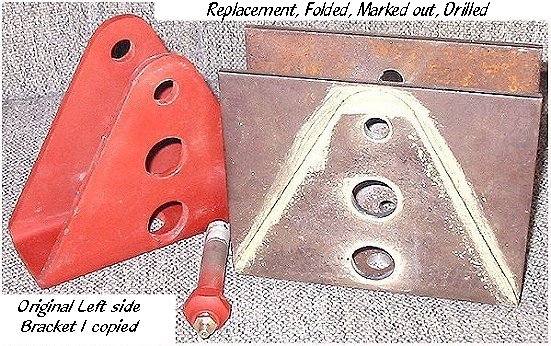
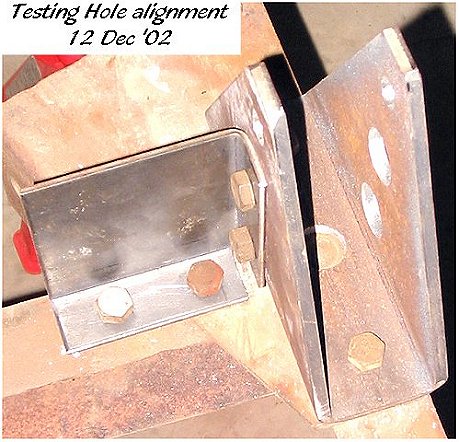
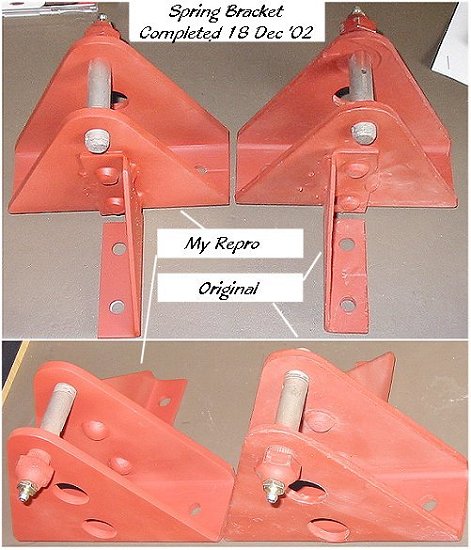
I'll have to fix the mid-rear X-member in first before replacing the front-mid X-member to ensure the frame doesn't twist. I've made new ends for the side reio plates and pics will be posted when completed I finally found a right side brake backing plate, just 2km's from my home, a friend over the other side of town realized he had NOS plates for his trailer restoration, so with some horse trading I managed to secure his old one, along with a Handbrake ratchet bracket, but unfortunately no handbrake to go with it, Al is looking in New Zealand for a handbrake lever, probably from a Model A Ford, the pressings are the same, just the top part of the lever needs to be shortened. The 1/4ton Trailer Drawing List on JeepDraw has been updated over the past week, if there's any drawing you need for the parts I'm making for this trailer you can find the available drawings there. 15th December I decided to replace the rough home made right spring bracket with something more closely resembling the original. I had hoped to use the old rough one, as it's only redeeming quality was it was exactly the right distance between the two sides.... that is 1.750", but unfortunately, it was too short in height and almost 1/2" to short where it mounts to the frame. Using the original from the left side I drew up a replacement, had a local steel shop do the bending and proceeded from there. The bracket was completed on the 18th Dec. ( Last pic on the lower right)
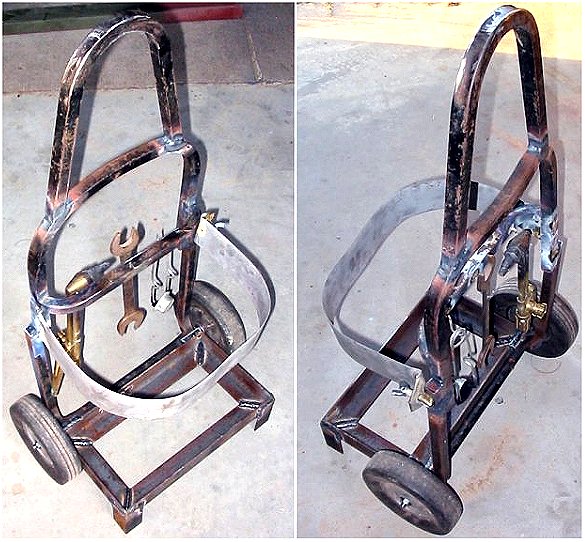
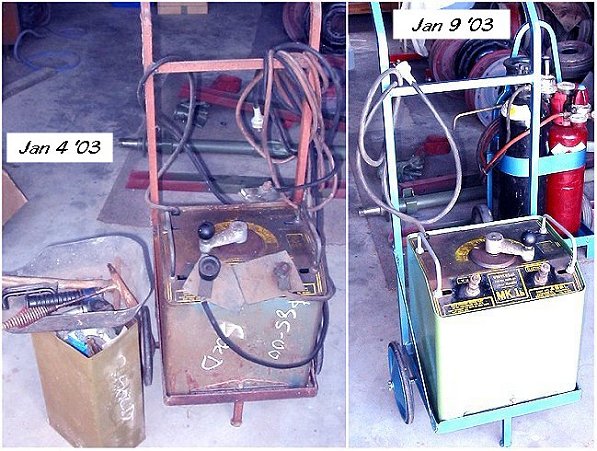
Having spent Christmas and the New Year break on making an Oxy cart and restoring an old arc welder I'm now ready to tackle the rest of the trailer without the usual hold-ups waiting for the use of this equipment. Sean Elliott in Brisbane, came up between Christmas and New Year to lend me his Oxy gear on a semi-permanent basis as he hadn't used it in years. Then when Sean decided he was going to print his speedo and gauge faces, and I had a spare printing machine handy, we decided to make it a clean swap, oxy gear for the printing machine.. we both win that way. I made the Oxy cart from an old square tube chair. ( It's a bit obvious when you look at it, but it will do the job), and the wheels came off an old lawn mower. The following weekend I purchased an old arc welder for AU$85 which included all the safety gear and AU$50 worth of rods, a real bargain.
Having sorted out the welders I immediately finished off the
side reio plates that have been hanging
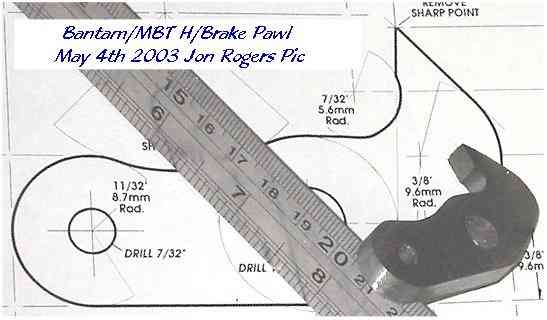
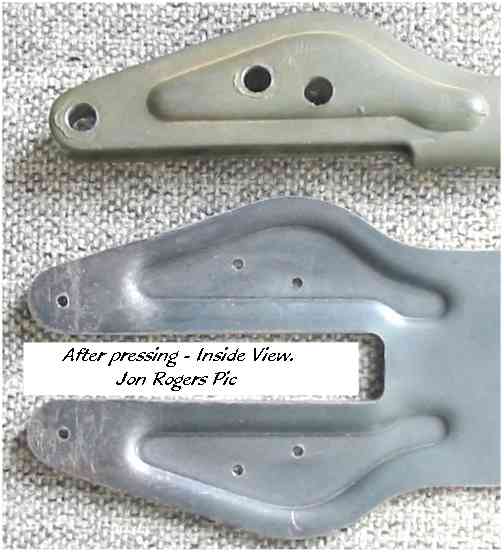
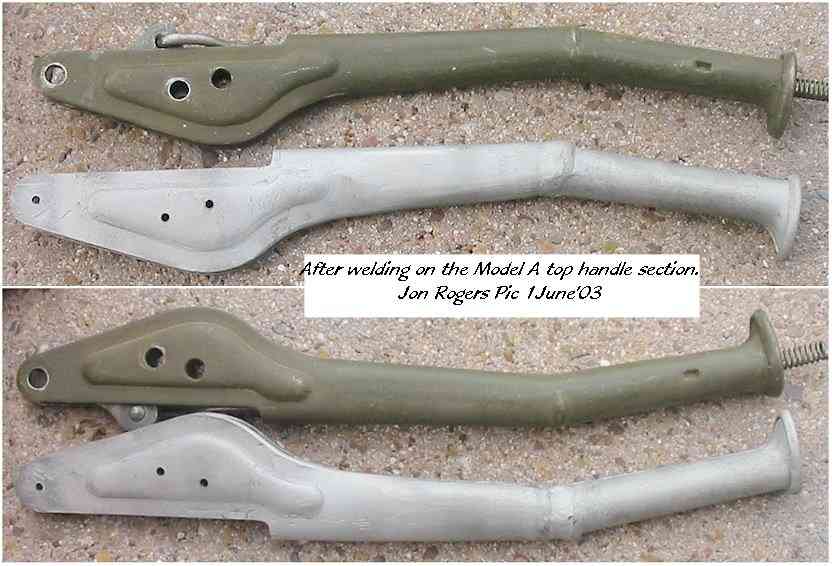
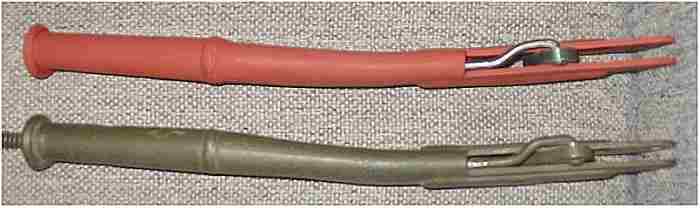
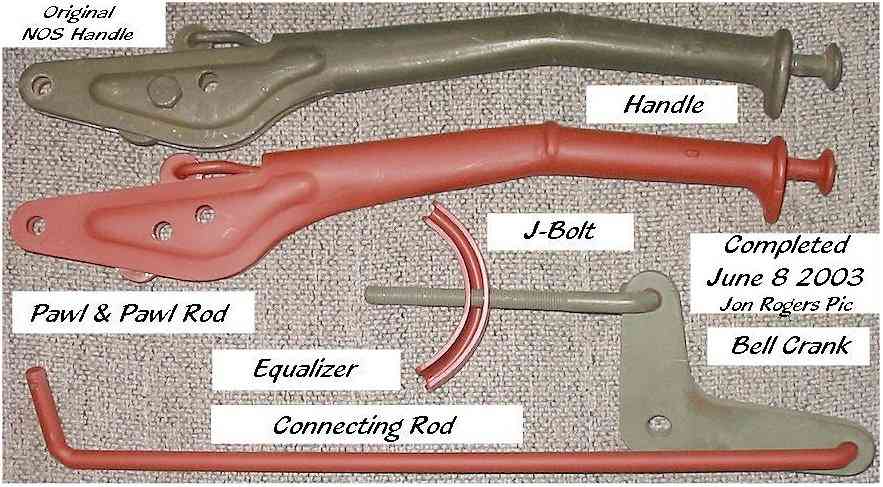
(APRIL - JUNE) HAND BRAKE ASSEMBLY FABRICATION I've been fiddling with the idea of making my own Hand Brake assembly for some time as it's almost impossible to find one. Luckily for me a mate over the other side of town had an NOS one, including the handle, I was able to borrow. So I knocked up some drawings and proceeded to go through what was involved. Thanks to Al Brass who let me in on how to make a form die I figured the rest would be easy enough to go ahead. Due to work commitments this has taken longer than it should have, the form die took about 4 hours to make and the rest about another 4 hours... Not bad for a days work. The top part of the handle came via. Al Brass in New Zealand, it's from a 30's Ford Model A. The difference between it and the regular Bantam/MBT are the indents to hold the pawl rod spring. The Model A handle has a tube insert for the spring and doesn't require the indents. All the drawings are available through the JeepDraw 1/4ton Trailer Section
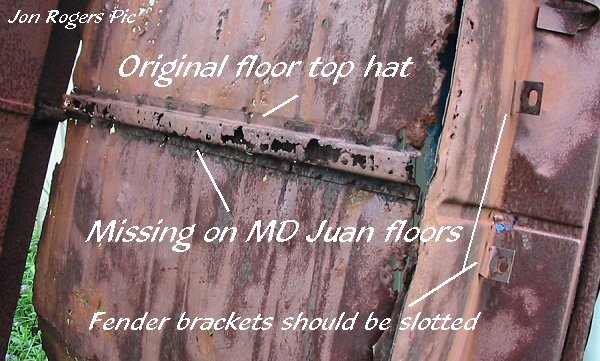
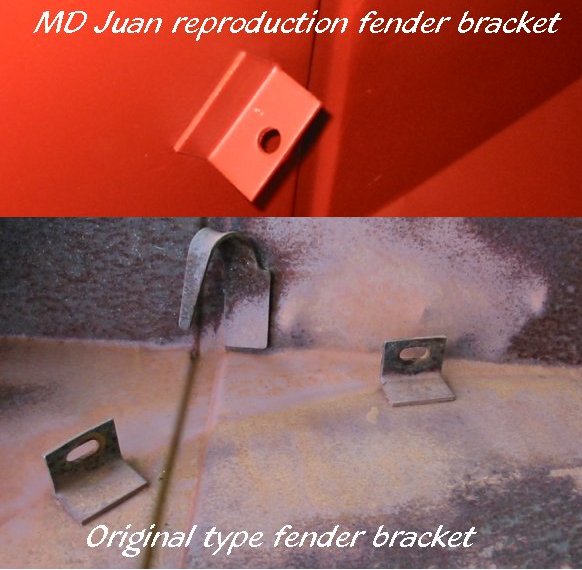
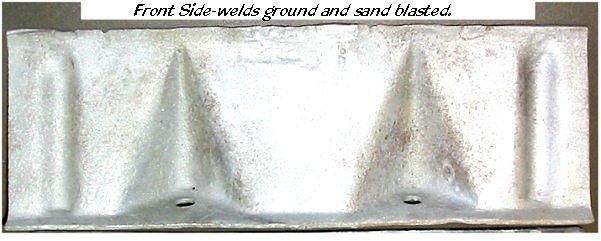
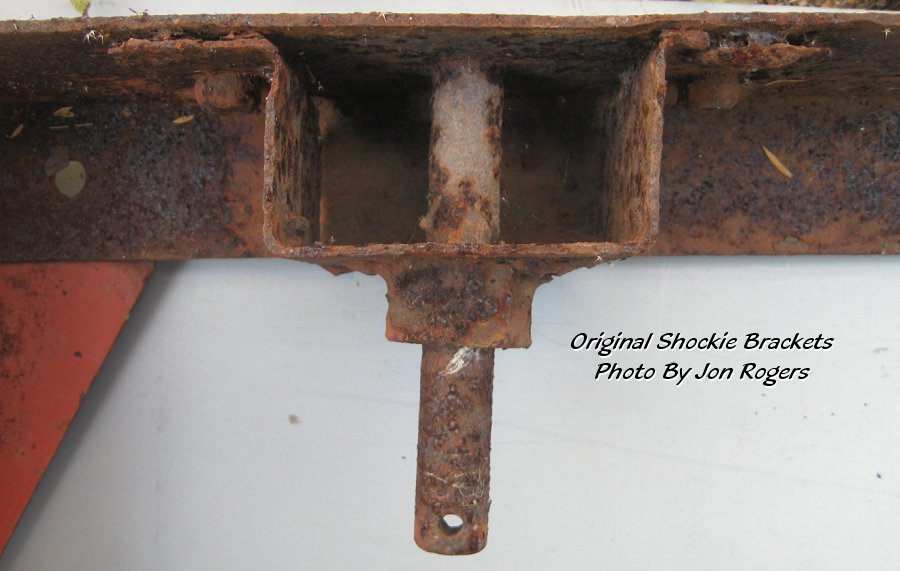
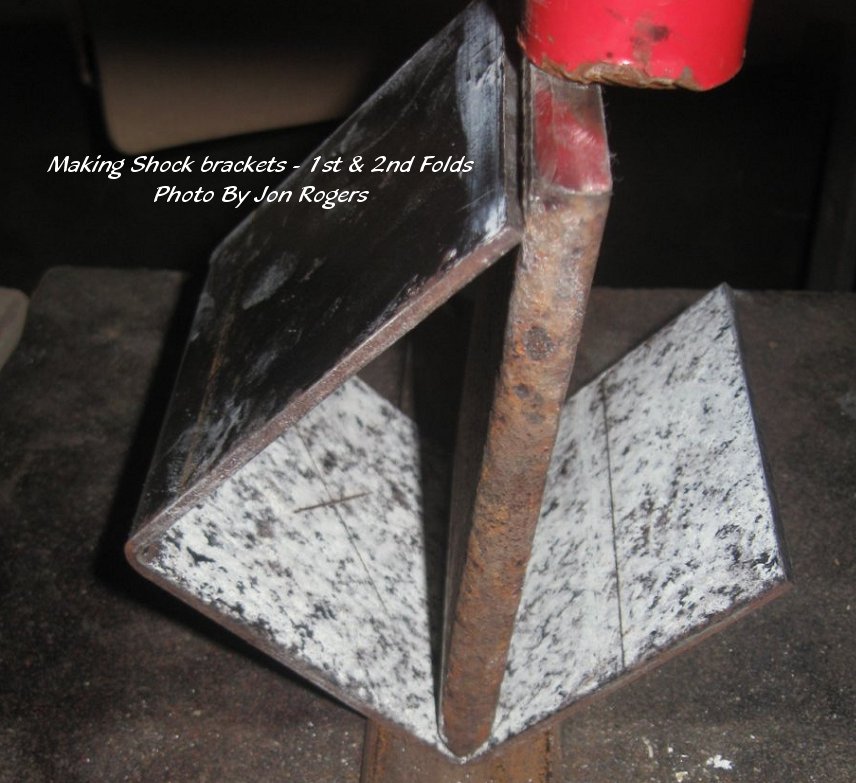
The above pics show the finished Handle, and home made assembly. Completed 8th June R eceived the bearings for the wheels from Ron Fitzpatrick Jeep Parts, along with a complete set of bearings ( wheels, gearbox, t/fer case, the lot) needed for the GPW jeep. Received the handbrake pivot bolt from Paul FitzGerald in the US. At long last I finally found the elusive right side brake backing plate, on Ebay of all places, it should be here in a few weeks and I can carry on with the restoration. Purchased an MD Juan tub, impressed with the panels so far but not their frame/chassis and A-Brace beams. I didn't really want the frame/chassis. (SEP-OCT)After a hiatus of a few years and now retired, I decided to get back into the trailer, so in the past few weeks I've done some work. The Shockie Brackets on my original frame were toast, so not wanting to pay someone to cut and fold the brackets I decided to make them myself. I started by going to the local re-cycle centre, picked up some work hardened flat steel ( old slasher blades) to make a folding blade, ground a V into some 1" block and after cutting the plates, pressed them in my 20 Ton press. They turned out Ok, actually I was surprised how well I managed to get them to match the originals. The shaft was turned on my lathe, along with the spacer. A few welds, a few holes and rivets and I was back on track. The difference between my early Willys MBT, and later Bantam and Willys mine were simple reverse folds and no extra fold to the frame rail, making my job so much easier.
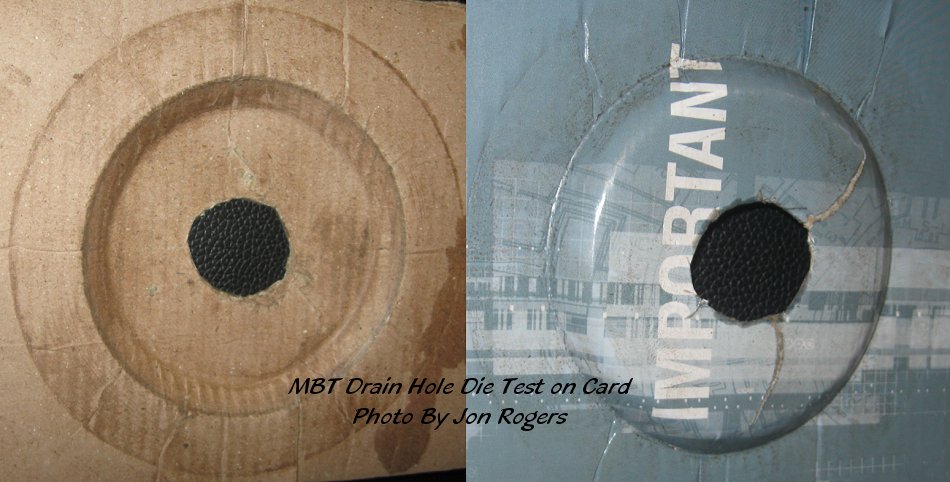
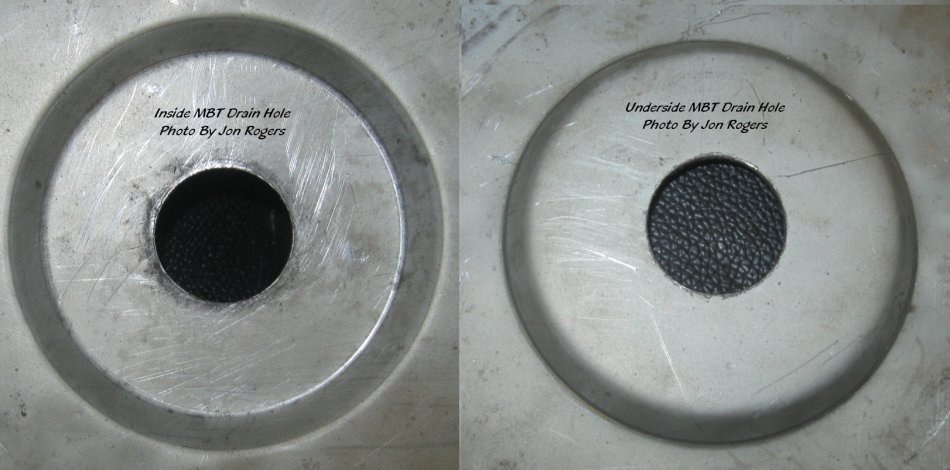
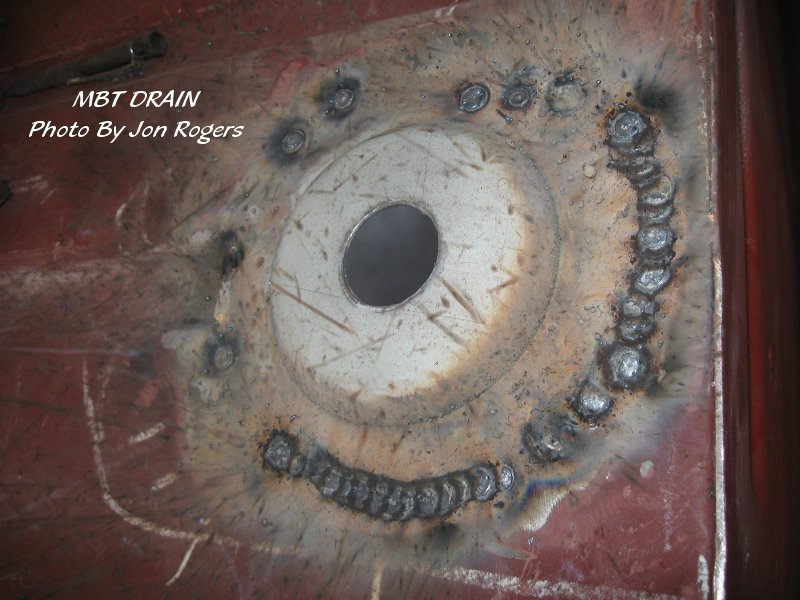
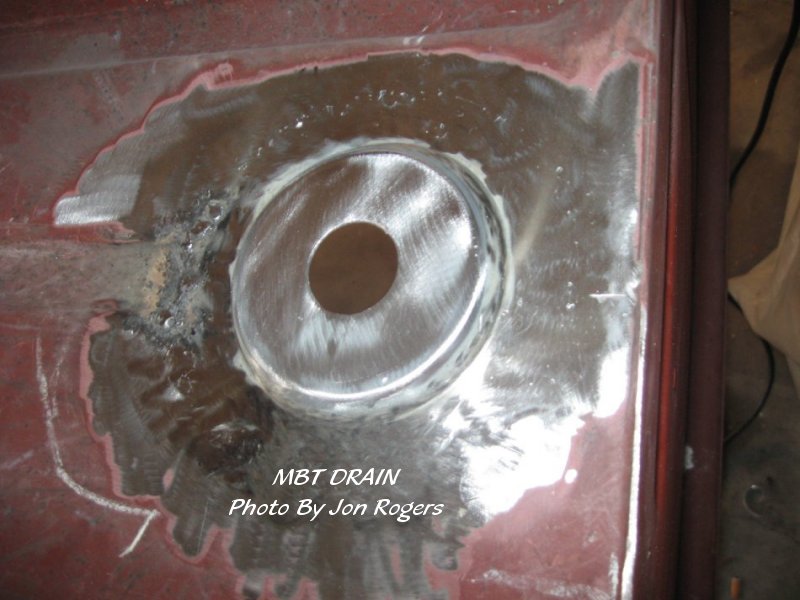
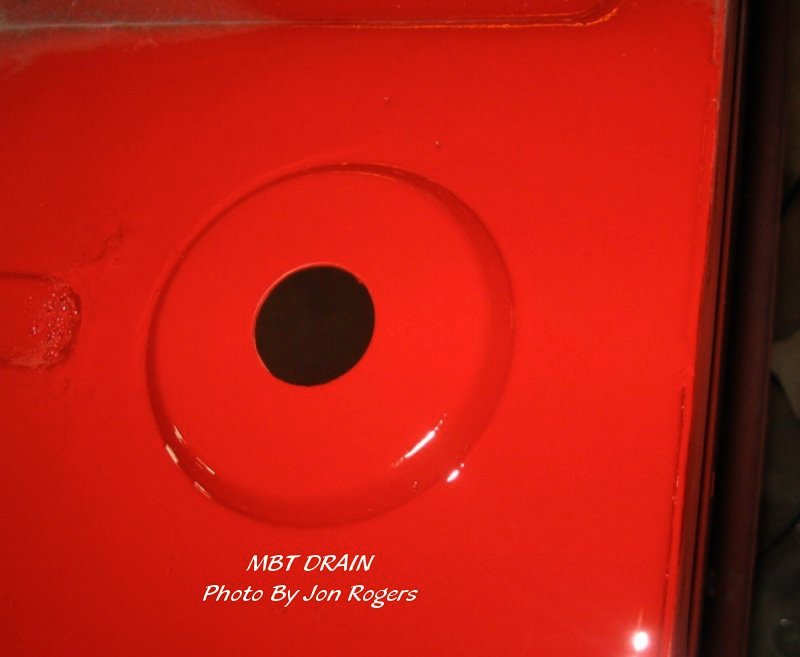
The Dreaded Drain Hole Installation. Made a die set, did a test on some card to check the debth and crush on the edges, then stamped out a plate, it worked well but did get some stretch areas outside the die area, an easy fix, I just cut the sheeting to the diameter of the die and transfered that to the tub . Held in place with magnets until the first spot or two with the mig, then teased up and down until the edges lines up. Completed with stitch welds, ground off the excess and a coat of primer until I make the part which is attached to hold the drain plug. Might have to make another set of dies to form the next piece.
|